The drive in bay two of my old Synology DS920+ kept throwing an amber light every couple of weeks. I swapped cables, updated firmware, ran extended SMART tests, all of it. The actual problem was that I had rushed the install and never fully clicked the tray home, so the SATA connector was making contact about 90 percent of the time.
That taught me something. Getting a drive to physically sit right is half the battle with a NAS.
Most guides skip the hardware part and jump straight to formatting and RAID types. This one stays on the metal: how to unbox, seat, screw, order, and safely swap the actual spinning disks. Do this part carefully and the software side almost always behaves.
Step 1: Unbox the drives without damaging them
New drives ship in antistatic bags inside molded foam for a reason. Handle them by the edges, keep the label side up, and set them on a hard flat surface, never on carpet or a fuzzy blanket.
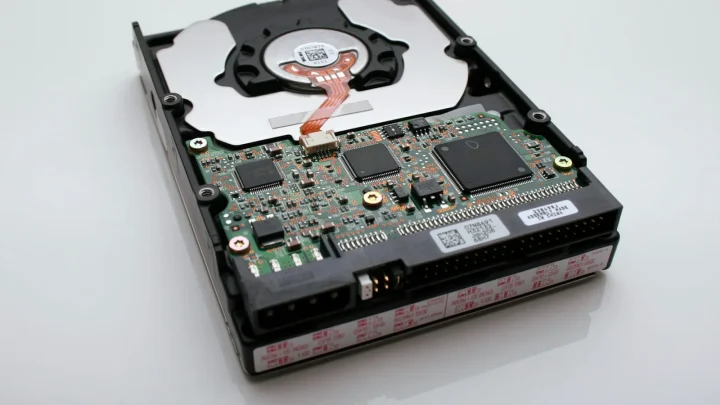
Give each drive a quick look before it goes anywhere near the NAS. You are checking for bent connector pins, a cracked casing, or any rattle when you gently tilt it. A rattle usually means a loose screw inside, which is an instant return.
Write down the serial number of each drive and which bay it goes into. When a disk fails two years from now, that little note tells you exactly which physical drive to pull instead of playing guess-and-check with your data.
Match your drives to the workload
Regular desktop drives technically fit, but they are tuned differently. NAS-rated models like the WD Red Plus or Seagate IronWolf handle constant vibration from neighboring drives and run 24/7 firmware timeouts that stop a slow read from getting kicked out of the array. It is worth the extra 15 to 25 dollars per drive.
Step 2: Understand your tray or caddy type
Before you touch a screw, figure out which mounting system your NAS uses. There are two common styles, and they change every step that follows.
| Tray type | How it holds the drive | Typical brands |
|---|---|---|
| Toolless (plastic side rails) | Snap-in side clips grip the screw holes on the drive edge | Synology Plus series, QNAP HS models |
| Screw-in (metal caddy) | Four screws through the tray into the drive base or sides | Older Synology, most rackmount units, Asustor |
Toolless trays are faster but a little less secure, so make sure the rails actually click. Screw-in trays take longer but hold the drive dead still, which cuts down on vibration noise.
Step 3: Seat the drive in the tray
Pull the tray fully out of the bay. On Synology and QNAP units you press a small latch or button and the handle pops out, then the whole tray slides free with light pressure.
For a toolless tray, pop off both plastic side rails, drop the drive in with the connector facing the back of the tray, then press the rails back until they click into the drive holes. The connector edge should sit flush with the tray edge that faces into the NAS.
For a screw-in caddy, line up the four holes and use the coarse-thread screws that came with the drive or NAS. Snug, not gorilla-tight. Overtightening strips the soft aluminum threads on cheaper caddies and can even flex the drive housing.
Give the mounted drive a gentle wiggle. Zero movement is what you want.
Step 4: Get the bay order right
Bay order matters more than people think. Your NAS almost always builds its first storage pool starting from bay 1, so put your first drive there and fill left to right, or top to bottom on vertical units.
If you are installing a mix of sizes, the golden rule is simple. In most RAID setups the array is limited by the smallest drive, so keep drive sizes matched within a single pool. A lone 4TB disk sitting in a pool of 8TB drives wastes half of every big drive.
Load the bays evenly for airflow too. If you only have two drives going into a four-bay unit, spreading them to bays 1 and 3 rather than 1 and 2 lets air move between them and keeps temperatures a few degrees lower.
Step 5: Slide trays home and lock them
Push the tray in straight, never at an angle. You will feel light resistance, then a firmer stop as the drive connector mates with the internal backplane. Press until the handle snaps flush with the chassis face.
Many trays have a small locking mechanism, either a plastic slider or a key lock on rackmount gear. Engage it. It stops a tray from creeping loose over months of fan vibration and blocks an accidental knock from popping a live drive.
Do a final pass across the whole front of the unit. Every handle should sit at the same depth. One tray sticking out even 2mm is your sign that a drive did not seat.
Step 6: Handle hot-swap safely
Hot-swap means adding or replacing a drive while the NAS is powered on, and most multi-bay NAS units built in the last decade support it. It is genuinely useful, but only when done in the right order.
Never yank a live drive that the system still thinks is part of an active volume. On Synology you go into Storage Manager and use the deactivate option first. On QNAP the equivalent lives in Storage and Snapshots. Pulling a drive the software still considers online can degrade or, worst case, drop your array.
When you insert a fresh drive into a running system, wait. The NAS needs 20 to 60 seconds to detect it, and rebuilding a RAID array onto that new disk can run for hours or even a full day on large drives. Let the resync finish before you touch anything else. If you want the official steps for your model, Synology publishes a clear walkthrough in their knowledge base on replacing and expanding drives.
Step 7: Verify before you trust it
Power up (or wait for detection), then open your storage dashboard. Every installed drive should appear healthy with its full capacity showing.
Run a quick SMART test on each new drive right away. It takes a couple of minutes and catches an early-failure disk before you have committed real data to it. For background on what those SMART attributes actually mean, Backblaze has an excellent breakdown of the stats that predict drive failure.
Check the reported temperature too. A drive idling above 45 to 50 degrees Celsius straight out of the box usually means poor airflow or a bay-order problem worth fixing now.
Common install mistakes I still see
- Using the wrong screws, then wondering why the drive rattles or will not sit flat.
- Forgetting antistatic precautions and blaming a dead drive on the manufacturer.
- Mixing brand-new and shucked USB-extracted drives without checking the 3.3V pin issue that can stop some WD drives from powering on.
- Skipping the SMART test and only discovering a bad disk after a week of backups.
Putting it into practice
Installing NAS drives correctly is not complicated, it just rewards patience. Seat each drive fully, use the right screws, fill your bays in order, and confirm health before you load a single file.
Do that, and the next amber warning light you see will be a real fault, not a tray you never quite pushed home. That alone saves hours of chasing ghosts.
Take the extra ten minutes now. Future you, staring at a rebuild progress bar at 2am, will be grateful you did it right the first time.
Frequently asked questions
Do I have to turn off my NAS to install hard drives?
For a brand-new NAS with no data yet, power it off, install every drive, then boot once. For an existing NAS that supports hot-swap, you can add or replace one drive while it runs, but you must deactivate the old drive in the software first. Check your model's spec sheet to confirm hot-swap support before pulling anything live.
What screws do I use to mount a NAS drive?
Use the coarse-thread screws that shipped with the drive or NAS, usually 6-32 for 3.5 inch drives and finer M3 screws for 2.5 inch drives and SSDs. Do not overtighten, snug is enough. The wrong thread pitch will either not bite or will strip the soft aluminum caddy threads.
Does the order I fill the bays matter?
Yes. Most NAS units build the first storage pool starting from bay 1, so fill left to right or top to bottom. If you are only using some bays, spacing the drives apart improves airflow and lowers temperatures. Keep matched drive sizes together in one pool to avoid wasting capacity.
Can I mix drive sizes in the same NAS?
You can physically install different sizes, but in a standard RAID pool the array is limited by the smallest drive, so larger disks lose their extra space. Some systems like Synology Hybrid RAID reclaim some of that, but the cleanest approach is matching sizes within a single pool. Mixing is fine across separate pools.
How do I know a drive is seated correctly?
The tray handle should sit flush with the chassis at the same depth as every other tray, and the latch should audibly click. Give the mounted drive a gentle wiggle before insertion; it should not move in the tray. After powering on, the drive must show up healthy at its full capacity in your storage dashboard.
Should I use regular desktop drives or NAS drives?
NAS-rated drives like WD Red Plus or Seagate IronWolf are built for 24/7 operation, vibration from neighboring disks, and RAID-friendly error timeouts. Desktop drives can drop out of an array during a slow read because their timeouts are longer. The 15 to 25 dollar premium per drive is cheap insurance for data you care about.